
Free Changing Table:
This is one of my favorite projects! I was coming home from town one day thinking about re-doing Wells room to get all the dark furniture out and make it look more girly! I had been looking for a new changing table/dresser. I saw this sitting on the side of the road and of course drove past it. I got down the road and thought man that would be perfect for a changing table. I turned around and pulled in to check it out. I was going to go to the door and offer to buy it and nobody was home, so I assumed they were just giving it away. It was broken and all beat up, which was perfect because I was going to distress it! I loaded it in the back of my car, cleaned it really good, and sanded/distressed it! It turned out really cute and it was free!

Burlap Wreath:
This was a super cheap and easy project. I had a foam wreath and had 2 yards of burlap. I cut about 4 long pieces, wrapped my wreath first, and then just twisted and pin the burlap in. I like to change things often so I didn't glue it on! I made the flower by cutting some shear fabric in circles and gluing together in the middle.

Painted Rug:
My plan was to paint the rug under my kitchen table an off white color and do tan stripes on it. It was a red rug with the straw type material on the inside. Like an outdoors rug. Didn't turn out like I wanted because the red kept coming through after a WHOLE gallon of paint! So it ended up on the front porch and I bought a new rug at Ikea for under the table!


Lazy Susan:
This was a 3 dollar lazy Susan from Ikea that was just a natural wood. I painted it dark brown, then this aqua color, and sanded away!

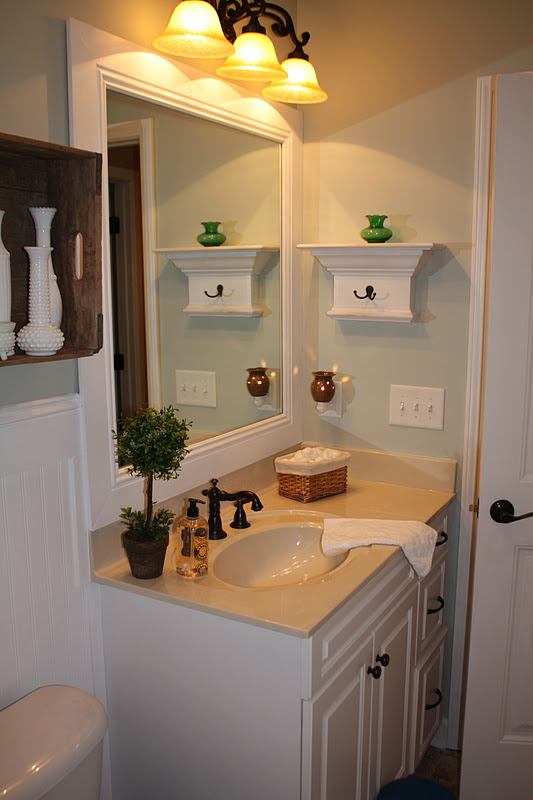
Kids Bathroom redo:
I was getting so tired of bright/dark colors in my house! I really hate I didn't take a before/after picture of this bathroom. It was a BRIGHT dark yellow. It was awful! I wanted to lighten it up and give it a clean look! I started by painting the light green color that I painted our kitchen with but I added some white to it to lighten it up a little more. Jared put up the bead-board on the bottom with the molding around. He also framed the mirror just by gluing the wood to the mirror! It is a cheap easy way to dress up your bathrooms! I saw some people glued their wood together before putting it up, so much easier to just glue each piece to the mirror!

I am going to add some hooks to the molding {on the plain wall} to hang the kids towels on! Check out a new love of mine, the vintage milk vases in the old crate! Love them!

I still am looking for things to decorate with with some pops of color!
If you didn't notice I have a new blog design! It turned out so cute thanks to Erin at Designer Blogs!
Follow me on Pinterest and Twitter now!!
Grab my new button on the right!

Also, I am now a Shabby Apple Affiliate! Click on the link on the right to order! They have the cutest dresses!! I am definitely getting these matching dresses for me and Wells!


.jpg)


Shelli,
ReplyDeleteI've missed you!! OMG I love how you have done so many DYI projects! Gurl looks like you have been busy! LOL...I am lovin' the distressed changing table and score it was free lol! OMG I am totally gonna steal the idea for the burlap wreath. Now did you wrap it in burlap first than loop the burlap over? I am gonna try it lol we will see ha! Love the milk jugs whoa now that is gonna be my thing lol! I love the color of your bathroom I am thinking of using a color similar throughout our hallway for a more clean look!
OMG that is funny about the rug about that made you so mad it does look really cute on your porch, and yay you got to get a new rug lol!
I love your new bloggy look
xoxo
Wow!!! Your blog is so cute! And your projects...please come to my house and make it over! You've made me wanna redo that ugly lampshade in my house with my leftover burlap. You're a creative genius! ;)
ReplyDelete